SwiftUI Essentials - Building Lists and Navigation

동적으로 목록 생성하기(Make the List Dynamic)
목록의 요소를 개별적으로 지정하는 대신 컬렉션에서 직접 행을 생성 할 수 있습니다.
데이터의 컬렉션과 컬렉션의 각 요소에 대한 뷰를 제공하는 클로저를 전달하여 컬렉션의 요소를 표시하는 목록을 만들 수 있습니다. 제공된 클로저를 사용하여 목록의 각 요소를 자식뷰로 변환합니다.
Instead of specifying a list’s elements individually, you can generate rows directly from a collection.
You can create a list that displays the elements of collection by passing your collection of data and a closure that provides a view for each element in the collection. The list transforms each element in the collection into a child view by using the supplied closure.

Step 1
두 개의 정적 랜드 마크 행을 제거하고 대신 LandmarkData를 List 초기화 프로그램에 전달하세요
식별 가능한 데이터에 대한 작업을 나열합니다. 두 가지 방법 중 하나로 데이터를 식별 할 수 있습니다. 데이터와 함께 각 요소를 고유하게 식별하는 속성의 주요 경로를 전달하거나 데이터 유형이 Identifiable 프로토콜을 준수하게합니다.
Remove the two static landmark rows, and instead pass landmarkData to the List initializer.
Lists work with identifiable data. You can make your data identifiable in one of two ways: by passing along with your data a key path to a property that uniquely identifies each element, or by making your data type conform to the Identifiable protocol.
import SwiftUI

struct LandmarkList: View {
    var body: some View {
        List(landmarkData, id: \.id) { landmark in

        }
    }
}

struct LandmarkList_Previews: PreviewProvider {
    static var previews: some View {
        LandmarkList()
    }
}
Step 2
클로저에서 LandmarkRow를 반환하여 동적으로 생성 된 목록을 완성하십시오.
이것은 landmarkData 배열의 각 요소에 대해 하나의 LandmarkRow를 작성합니다.
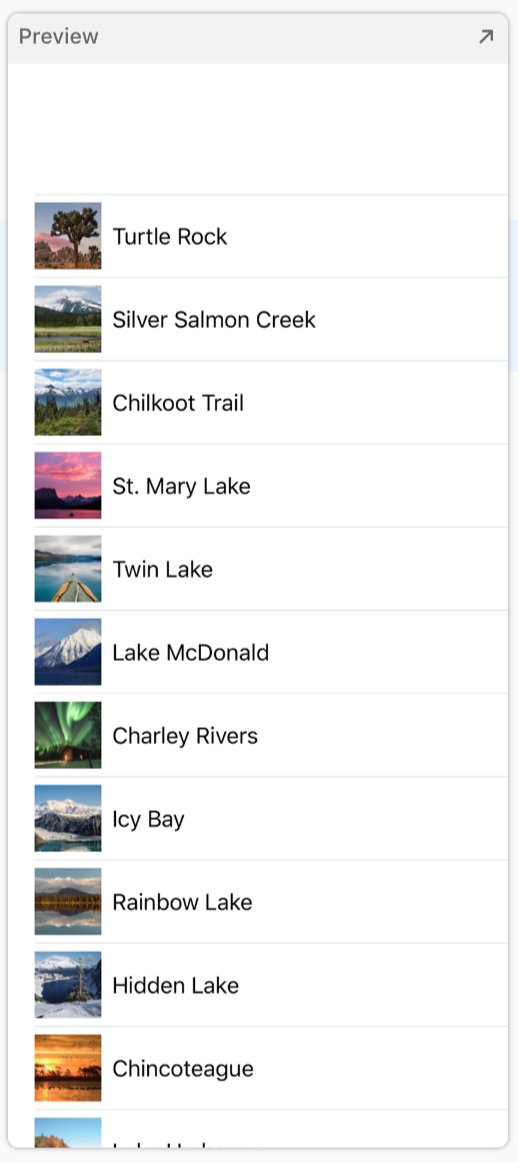
Complete the dynamically-generated list by returning a LandmarkRow from the closure.
This creates one LandmarkRow for each element in the landmarkData array.
import SwiftUI

struct LandmarkList: View {
    var body: some View {
        List(landmarkData, id: \.id) { landmark in
            LandmarkRow(landmark: landmark)
        }
    }
}

struct LandmarkList_Previews: PreviewProvider {
    static var previews: some View {
        LandmarkList()
    }
}
다음으로 랜드 마크 유형에 식별 가능한 적합성을 추가하여 목록 코드를 단순화합니다.
Next, you’ll simplify the List code by adding Identifiable conformance to the Landmark type.
Step 3
Landmark.swift 파일을 선택하세요. Identifiable 프로토콜 채택을 추가하세요.
랜드 마크 유형에는 이미 Identifiable 프로토콜에 필요한 id 속성이 있으므로 더 이상 할 일이 없습니다.
Switch to Landmark.swift and declare conformance to the Identifiable protocol.
Since the Landmark type already has the id property required by Identifiable protocol, there’s no more work to do.
import SwiftUI
import CoreLocation

struct Landmark: Hashable, Codable, Identifiable {
    var id: Int
    var name: String
    fileprivate var imageName: String
    fileprivate var coordinates: Coordinates
    var state: String
    var park: String
    var category: Category

    var locationCoordinate: CLLocationCoordinate2D {
        CLLocationCoordinate2D(
            latitude: coordinates.latitude,
            longitude: coordinates.longitude)
    }

    enum Category: String, CaseIterable, Codable, Hashable {
        case featured = "Featured"
        case lakes = "Lakes"
        case rivers = "Rivers"
    }
}

extension Landmark {
    var image: Image {
        ImageStore.shared.image(name: imageName)
    }
}

struct Coordinates: Hashable, Codable {
    var latitude: Double
    var longitude: Double
}
Step 4
LandmarkList.swift로 다시 전환하고 id 매개 변수를 제거하세요.
이제부터 Landmark elem 컬렉션을 사용할 수 있습니다.
Switch back to LandmarkList.swift and remove the id parameter.
From now on, you’ll be able to use collections of Landmark elements directly.
import SwiftUI

struct LandmarkList: View {
    var body: some View {
        List(landmarkData) { landmark in
            LandmarkRow(landmark: landmark)
        }
    }
}

struct LandmarkList_Previews: PreviewProvider {
    static var previews: some View {
        LandmarkList()
    }
}
네비게이션 설정 및 상세 페이지(Set Up Navigation Between List and Detail)
목록이 올바르게 렌더링되지만 개별 랜드 마크를 탭하여 해당 랜드 마크의 세부 사항 페이지를 아직 볼 수는 없습니다.
NavigationView에 탐색 기능을 포함시킨 다음 NavigationLink에 각 행을 중첩하여 탐색 기능을 목록에 추가하여 대상 뷰로의 전환을 설정해보겠습니다.
The list renders properly, but you can’t tap an individual landmark to see that landmark’s detail page yet.
You add navigation capabilities to a list by embedding it in a NavigationView, and then nesting each row in a NavigationLink to set up a transtition to a destination view.

Step 1
NavigationView로 List위에 감싸세요 NavigationView에 동적으로 생성 된 랜드 마크 목록이 포함되도록합니다.
Embed the dynamically generated list of landmarks in a NavigationView.
import SwiftUI

struct LandmarkList: View {
    var body: some View {
        NavigationView {
            List(landmarkData) { landmark in
                LandmarkRow(landmark: landmark)
            }
        }
    }
}

struct LandmarkList_Previews: PreviewProvider {
    static var previews: some View {
        LandmarkList()
    }
}
Step 2
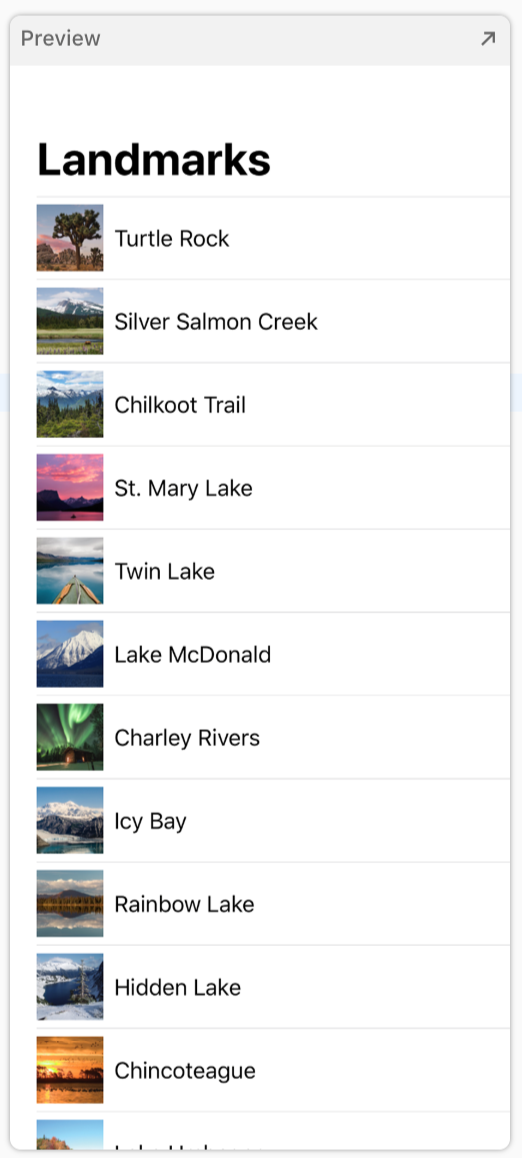
목록을 표시 할 때 네비게이션바의 제목을 설정하려면 navigationBarTitle (_ :) 수정자 메서드를 사용합니다.
Call the navigationBarTitle(_:) modifier method to set the title of the navigation bar when displaying the list.
import SwiftUI

struct LandmarkList: View {
    var body: some View {
        NavigationView {
            List(landmarkData) { landmark in
                LandmarkRow(landmark: landmark)
            }
            .navigationBarTitle(Text("Landmarks"))
        }
    }
}

struct LandmarkList_Previews: PreviewProvider {
    static var previews: some View {
        LandmarkList()
    }
}
Step 3
리스트 클로저안에서 LandmarkDetail 뷰를 목적지로 하여 반환 된 행을 NavigationLink에 래핑합니다.
Inside the list’s closure, wrap the returned row in a NavigationLink, specifying the LandmarkDetail view as the destination.
import SwiftUI

struct LandmarkList: View {
    var body: some View {
        NavigationView {
            List(landmarkData) { landmark in
                NavigationLink(destination: LandmarkDetail()) {
                    LandmarkRow(landmark: landmark)
                }
            }
            .navigationBarTitle(Text("Landmarks"))
        }
    }
}

struct LandmarkList_Previews: PreviewProvider {
    static var previews: some View {
        LandmarkList()
    }
}
Step 4
라이브 모드로 전환하여 미리보기에서 네비게이션을 직접 테스트 할 수 있습니다. 라이브 미리보기 버튼을 클릭하고 랜드 마크를 탭하여 상세 페이지를 방문해보세요!
You can try out the navigation directly in the preview by switching to live mode. Click the Live Preview button and tap a landmark to visit the detail page.

자식 뷰에게 데이터 전달하기(Pass Data into Child Views)
LandmarkDetail뷰는 여전히 하드 코딩된 세부 정보를 사용하여 랜드마크를 표시합니다. LandmarkRow와 마찬가지로 LandmarkDetail 타입으로 구성된 뷰는 데이터 소스로 landmark 프로퍼티가 필요합니다.
자식뷰부터 시작하여 CircleImage, MapView, LandmarkDetail을 변환하여 각 행을 하드 코딩하는 대신 전달된 데이터를 표시합니다.
The LandmarkDetail view still uses hard-coded details to show its landmark. Just like LandmarkRow, the LandmarkDetail type and the views it comprises need to use a landmark property as the source for their data.
Starting with the child views, you’ll convert CircleImage, MapView, and then LandmarkDetail to display data that’s passed in, rather than hard-coding each row.

Step 1
CircleImage.swift에서 저장 이미지(image) 프로퍼티를 CircleImage에 추가합니다.
SwiftUI를 사용하여 뷰를 빌드 할 때 일반적인 패턴입니다. 사용자 지정 뷰는 종종 특정 뷰에 대한 일련의 수정자를 래핑하고 캡슐화합니다.
In CircleImage.swift, add a stored image property to CircleImage.
This is a common pattern when building views using SwiftUI. Your custom views will often wrap and encapsulate a series of modifiers for a particular view.
import SwiftUI

struct CircleImage: View {
    var image: Image

    var body: some View {
        image
            .clipShape(Circle())
            .overlay(Circle().stroke(Color.white, lineWidth: 4))
            .shadow(radius: 10)
    }
}

struct CircleImage_Preview: PreviewProvider {
    static var previews: some View {
        CircleImage()
    }
}
Step 2
Turtle Rock의 이미지를 전달하도록 미리보기 제공자를 업데이트하세요.
Update the preview provider to pass the image of Turtle Rock.
import SwiftUI

struct CircleImage: View {
    var image: Image

    var body: some View {
        image
            .clipShape(Circle())
            .overlay(Circle().stroke(Color.white, lineWidth: 4))
            .shadow(radius: 10)
    }
}

struct CircleImage_Preview: PreviewProvider {
    static var previews: some View {
        CircleImage(image: Image("turtlerock"))
    }
}
Step 3
MapView.swift에서 좌표 속성을 MapView에 추가하고 위도와 경도를 하드 코딩하는 대신 해당 프로퍼티를 사용하도록 코드를 수정합니다.
In MapView.swift, add a coordinate property to MapView and convert the code to use that property instead of hard-coding the latitude and longitude.
import SwiftUI
import MapKit

struct MapView: UIViewRepresentable {
    var coordinate: CLLocationCoordinate2D

    func makeUIView(context: Context) -> MKMapView {
        MKMapView(frame: .zero)
    }

    func updateUIView(_ view: MKMapView, context: Context) {

        let span = MKCoordinateSpan(latitudeDelta: 0.02, longitudeDelta: 0.02)
        let region = MKCoordinateRegion(center: coordinate, span: span)
        view.setRegion(region, animated: true)
    }
}

struct MapView_Preview: PreviewProvider {
    static var previews: some View {
        MapView()
    }
}
Step 4
데이터 배열에서 첫 번째 랜드 마크의 좌표를 전달하도록 미리보기 제공자를 업데이트하세요.
Update the preview provider to pass the coordinate of the first landmark in the data array.
import SwiftUI
import MapKit

struct MapView: UIViewRepresentable {
    var coordinate: CLLocationCoordinate2D

    func makeUIView(context: Context) -> MKMapView {
        MKMapView(frame: .zero)
    }

    func updateUIView(_ view: MKMapView, context: Context) {
        let span = MKCoordinateSpan(latitudeDelta: 0.02, longitudeDelta: 0.02)
        let region = MKCoordinateRegion(center: coordinate, span: span)
        view.setRegion(region, animated: true)
    }
}

struct MapView_Preview: PreviewProvider {
    static var previews: some View {
        MapView(coordinate: landmarkData[0].locationCoordinate)
    }
}
Step 5
LandmarkDetail.swift에서 LandmarkDetail 유형에 Landmark 프로퍼티를 추가하세요.
In LandmarkDetail.swift, add a Landmark property to the LandmarkDetail type.
import SwiftUI

struct LandmarkDetail: View {
    var landmark: Landmark

    var body: some View {
        VStack {
            MapView()
                .frame(height: 300)

            CircleImage()
                .offset(y: -130)
                .padding(.bottom, -130)

            VStack(alignment: .leading) {
                Text("Turtle Rock")
                    .font(.title)

                HStack(alignment: .top) {
                    Text("Joshua Tree National Park")
                        .font(.subheadline)
                    Spacer()
                    Text("California")
                        .font(.subheadline)
                }
            }
            .padding()

            Spacer()
        }
    }
}

struct LandmarkDetail_Preview: PreviewProvider {
    static var previews: some View {
        LandmarkDetail()
    }
}
Step 6
landmarkData에서 첫 번째 랜드마크를 사용하도록 미리보기를 업데이트하세요.
Update the preview to use the first landmark from landmarkData.
import SwiftUI

struct LandmarkDetail: View {
    var landmark: Landmark

    var body: some View {
        VStack {
            MapView()
                .frame(height: 300)

            CircleImage()
                .offset(y: -130)
                .padding(.bottom, -130)

            VStack(alignment: .leading) {
                Text("Turtle Rock")
                    .font(.title)

                HStack(alignment: .top) {
                    Text("Joshua Tree National Park")
                        .font(.subheadline)
                    Spacer()
                    Text("California")
                        .font(.subheadline)
                }
            }
            .padding()

            Spacer()
        }
    }
}

struct LandmarkDetail_Preview: PreviewProvider {
    static var previews: some View {
        LandmarkDetail(landmark: landmarkData[0])
    }
}
Step 7
필요한 데이터를 사용자 정의 유형으로 전달합니다.
Pass the required data down to your custom types.
import SwiftUI

struct LandmarkDetail: View {
    var landmark: Landmark

    var body: some View {
        VStack {
            MapView(coordinate: landmark.locationCoordinate)
                .frame(height: 300)

            CircleImage(image: landmark.image)
                .offset(y: -130)
                .padding(.bottom, -130)

            VStack(alignment: .leading) {
                Text(landmark.name)
                    .font(.title)

                HStack(alignment: .top) {
                    Text(landmark.park)
                        .font(.subheadline)
                    Spacer()
                    Text(landmark.state)
                        .font(.subheadline)
                }
            }
            .padding()

            Spacer()
        }
    }
}

struct LandmarkDetail_Preview: PreviewProvider {
    static var previews: some View {
        LandmarkDetail(landmark: landmarkData[0])
    }
}
Step 8
마지막으로 navigationBarTitle (_ : displayMode :) 수정자를 호출하여 상세보기를 표시할 때 탐색 막대에 제목을 지정하세요.
Finally, call the navigationBarTitle(_:displayMode:) modifier to give the navigation bar a title when showing the detail view.
import SwiftUI

struct LandmarkDetail: View {
    var landmark: Landmark

    var body: some View {
        VStack {
            MapView(coordinate: landmark.locationCoordinate)
                .frame(height: 300)

            CircleImage(image: landmark.image)
                .offset(y: -130)
                .padding(.bottom, -130)

            VStack(alignment: .leading) {
                Text(landmark.name)
                    .font(.title)

                HStack(alignment: .top) {
                    Text(landmark.park)
                        .font(.subheadline)
                    Spacer()
                    Text(landmark.state)
                        .font(.subheadline)
                }
            }
            .padding()

            Spacer()
        }
        .navigationBarTitle(Text(landmark.name), displayMode: .inline)
    }
}

struct LandmarkDetail_Preview: PreviewProvider {
    static var previews: some View {
    static var previews: some View {
        LandmarkDetail(landmark: landmarkData[0])
    }
}
Step 9
SceneDelegate.swift에서 앱의 루트뷰(rootview)를 LandmarkList로 수정합니다.
미리보기 대신 시뮬레이터에서 독립 실행 형으로 실행할 때 앱은 SceneDelegate에 정의된 루트뷰로 시작합니다.
In SceneDelegate.swift, switch the root view of the app to be LandmarkList.
Your app starts with the root view defined in the SceneDelegate when running standalone in the simulator instead of the preview.
import UIKit
import SwiftUI

class SceneDelegate: UIResponder, UIWindowSceneDelegate {
    var window: UIWindow?

    func scene(_ scene: UIScene, willConnectTo session: UISceneSession, options connectionOptions: UIScene.ConnectionOptions) {
        // Use this method to optionally configure and attach the UIWindow `window` to the provided UIWindowScene `scene`.
        // If using a storyboard, the `window` property will automatically be initialized and attached to the scene.
        // This delegate does not imply the connecting scene or session are new (see `application:configurationForConnectingSceneSession` instead).

        // Use a UIHostingController as window root view controller
        if let windowScene = scene as? UIWindowScene {
            let window = UIWindow(windowScene: windowScene)
            window.rootViewController = UIHostingController(rootView: LandmarkList())
            self.window = window
            window.makeKeyAndVisible()
        }
    }

    // ...
}
Step 10
LandmarkList.swift에서 현재 랜드 마크를 대상 LandmarkDetail로 전달하세요.
In LandmarkList.swift, pass the current landmark to the destination LandmarkDetail.
import SwiftUI

struct LandmarkList: View {
    var body: some View {
        NavigationView {
            List(landmarkData) { landmark in
                NavigationLink(destination: LandmarkDetail(landmark: landmark)) {
                    LandmarkRow(landmark: landmark)
                }
            }
            .navigationBarTitle(Text("Landmarks"))
        }
    }
}

struct LandmarkList_Previews: PreviewProvider {
    static var previews: some View {
        LandmarkList()
    }
}
Step 11
목록에서 상세뷰로 올바른 랜드마크가 표시되는지 확인하려면 실시간 미리보기로 전환하세요.
Switch to the live preview to see the detail view show the correct landmarks when you navigate from the list.

미리보기 동적 생성(Generating Previews Dynamically)
다음으로 LandmarkList_Previews preview provider에 코드를 추가하여 다양한 장치 크기에서 목록보기의 미리보기를 렌더링합니다. 기본적으로 미리보기는 active scheme 에서 장치의 크기로 렌더링됩니다. previewDevice (_ :) 수정 자 메서드를 호출하여 미리보기 장치를 변경할 수 있습니다.
Next, you’ll add code to the LandmarkList_Previews preview provider to render previews of the list view at different device sizes. By default, previews render at the size of the device in the active scheme. You can change the preview device by calling the previewDevice(_:) modifier method.

Step 1
현재 목록 미리보기를 변경하여 iPhone SE 크기로 렌더링합니다.
Xcode의 scheme 메뉴에 표시되는 모든 장치의 이름을 제공 할 수 있습니다.
Start by changing the current list preview to render at the size of an iPhone SE.
You can provide the name of any device as it appears in Xcode’s scheme menu.
import SwiftUI

struct LandmarkList: View {
    var body: some View {
        NavigationView {
            List(landmarkData) { landmark in
                NavigationLink(destination: LandmarkDetail(landmark: landmark)) {
                    LandmarkRow(landmark: landmark)
                }
            }
            .navigationBarTitle(Text("Landmarks"))
        }
    }
}

struct LandmarkList_Previews: PreviewProvider {
    static var previews: some View {
        LandmarkList()
            .previewDevice(PreviewDevice(rawValue: "iPhone SE"))
    }
}
Step 2
목록 미리보기 내에서 장치 이름 배열을 데이터로 사용하여 LandmarkList를 ForEach 인스턴스에 포함시킵니다.
ForEach는 리스트와 동일한 방식으로 컬렉션에서 작동하므로 스택, 목록, 그룹 등의 하위 뷰를 사용할 수있는 모든 위치에서 사용할 수 있습니다. 데이터 요소가 여기에서 사용하는 문자열과 같은 간단한 값 유형 인 경우 \ .self를 식별자의 키 경로로 사용할 수 있습니다.
Within the list preview, embed the LandmarkList in a ForEach instance, using an array of device names as the data.
ForEach operates on collections the same way as the list, which means you can use it anywhere you can use a child view, such as in stacks, lists, groups, and more. When the elements of your data are simple value types — like the strings you’re using here — you can use \.self as key path to the identifier.
import SwiftUI

struct LandmarkList: View {
    var body: some View {
        NavigationView {
            List(landmarkData) { landmark in
                NavigationLink(destination: LandmarkDetail(landmark: landmark)) {
                    LandmarkRow(landmark: landmark)
                }
            }
            .navigationBarTitle(Text("Landmarks"))
        }
    }
}

struct LandmarkList_Previews: PreviewProvider {
    static var previews: some View {
        ForEach(["iPhone SE", "iPhone XS Max"], id: \.self) { deviceName in
            LandmarkList()
                .previewDevice(PreviewDevice(rawValue: deviceName))
        }
    }
}
Step 3
previewDisplayName (_ :) 수정자를 사용하여 장치 이름을 미리보기의 레이블로 추가하십시오.
Use the previewDisplayName(_:) modifier to add the device names as labels for the previews.
import SwiftUI

struct LandmarkList: View {
    var body: some View {
        NavigationView {
            List(landmarkData) { landmark in
                NavigationLink(destination: LandmarkDetail(landmark: landmark)) {
                    LandmarkRow(landmark: landmark)
                }
            }
            .navigationBarTitle(Text("Landmarks"))
        }
    }
}

struct LandmarkList_Previews: PreviewProvider {
    static var previews: some View {
        ForEach(["iPhone SE", "iPhone XS Max"], id: \.self) { deviceName in
            LandmarkList()
                .previewDevice(PreviewDevice(rawValue: deviceName))
                .previewDisplayName(deviceName)
        }
    }
}
Step 4
캔버스에서 모든 장치를 실험하여 뷰의 렌더링을 비교할 수 있습니다.
You can experiment with different devices to compare the renderings of your views, all from the canvas.

#swiftui navigationbar
#swiftui navigation
#swiftui navigationbar title
#swiftui set navigation title
#swiftui란
#swiftui 기초
#swiftui 기본
#swiftui 강좌
#swiftui 강의
#swiftui 교육
#swiftui 시작하기
#swiftui 따라하기
#wwdc2019
#ios programming
#swiftui apple tutorial 번역
#swiftui apple 튜토리얼 번역
'IT > Swift' 카테고리의 다른 글
| SwiftUI Tutorials 4 Drawing Paths and Shapes (0) | 2019.11.02 |
|---|---|
| SwiftUI 튜토리얼 3 사용자 입력 다루기 (0) | 2019.10.26 |
| SwiftUI 튜토리얼 2-1 네비게이션가 리스트 만들기 (0) | 2019.10.22 |
| SwiftUI 튜토리얼 1-2 뷰의 생성과 조합 (0) | 2019.10.20 |
| SwiftUI 튜토리얼 1-1 뷰의 생성과 조합 (0) | 2019.10.17 |


